|
|
Page 23c |
|
Our Philipsburg, MT Trip - August 2013The next project was to install a new insulated sub floor. Gary and I worked on this product prior to the closing. I had seen a product much the same as this but it was not available for shipment to Missoula so he found this one that was actually a better design. The tiles are 24" square with an OSB surface glued to 3/4" styrofoam. The tiles are not glued or fastened to the floor and are spaced a quarter inch away from the walls to allow for expansion. Even though this product is designed for slab on grade applications, there is virtually no possibility of moisture wicking through the concrete (mountain side concrete slab poured on rock and sand) and this will provide a warm dry sub floor. Gary and Allyn worked on this installation while I finished the exterior siding work. I cut starter pieces so that the seams were alternated and the guys tapped the pieces in place providing a very sound unit. 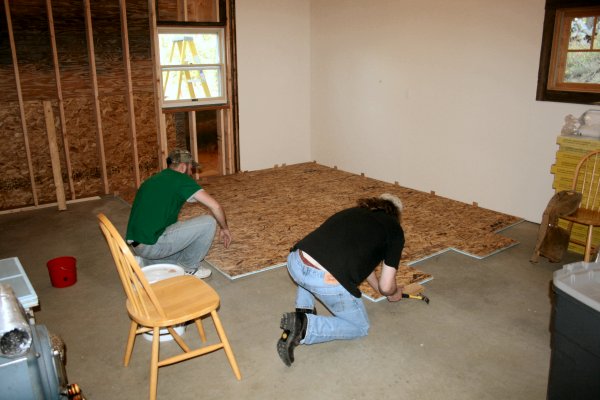
We completed the exterior work with wood siding left by the previous owner so there was no staining or finish work to do to the siding. The remainder of our work was now inside the cabin, which turned out to be a good thing as we had rain nearly every afternoon. It was generally a short rain shower but enough to have stopped progress outdoors. 
Gary's plan included framing a small bedroom area as well as a storage closet on the west end of the structure. We discussed this plan at length leading up to the move and determined that a seven foot high wall would offer privacy in the bedroom but also allow for good air movement in the cabin. Since Gary does not plan on air conditioning this air circulation is essential to overall comfort during the summer months. His other goal was not to waste a lot of space in the bedroom, no master suite here. So we began framing the bedroom leaving room for a queen sized bed and room to move along the side of the bed. 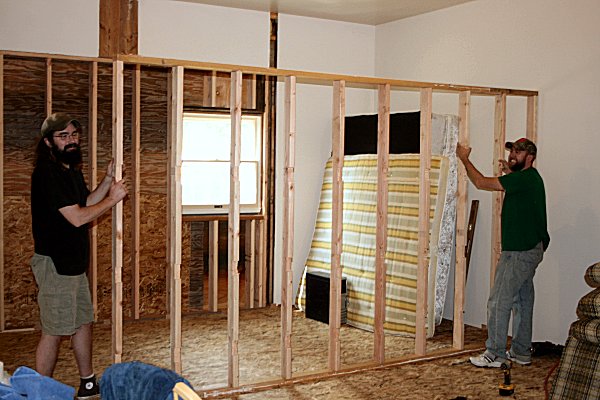
This wall was fastened to the outer wall as well as screwed to the floating floor according to the manufacturer's instructions on the floor. We sheet rocked the bedroom side of the wall and paneled the living room side of the wall with the left over siding from outdoors. I ship lapped the 1 X 10's and stained the edges in the event there is shrinkage in the wood. We used a single 1 X 10 topped with a 1 X 2 as baseboard so that the 12' siding pieces could be cut in half and eliminate wasted material. 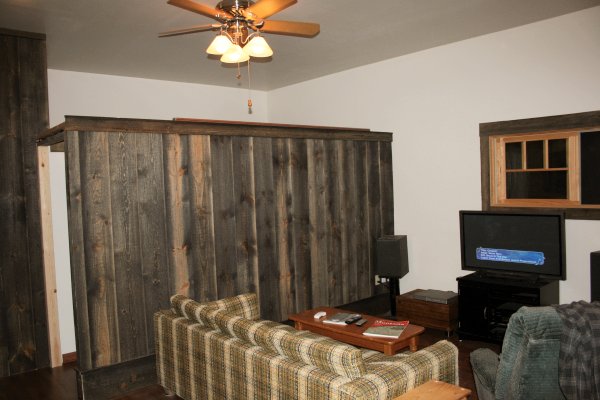
We also framed a closet on the west wall that will provide plenty of storage with 8-shelves two feet deep and four foot long. There is also a clothes closet in the bedroom. With the walls finished we laid a floating laminate floor throughout the cabin, except near the wood stove. The area around the stove will be finished with large quarry tile to be determined later. 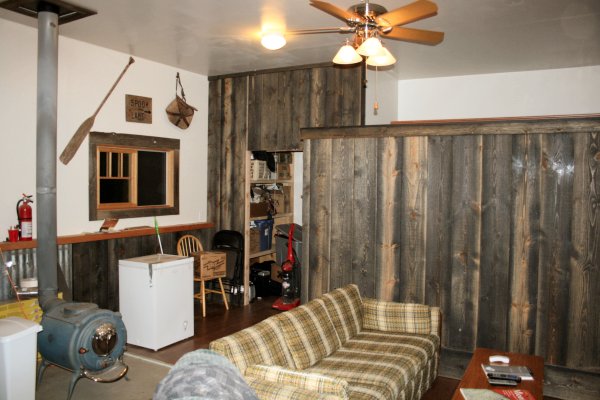
Our finish work has a touch of humor or irony in the use of the term finish work. Gary wanted the rustic look to the finish so we opened a pile of salvage lumber that the previous owner had stacked and covered with steel siding down the hill from the cabin. We found enough natural edge local cut boards to make window and door casing. 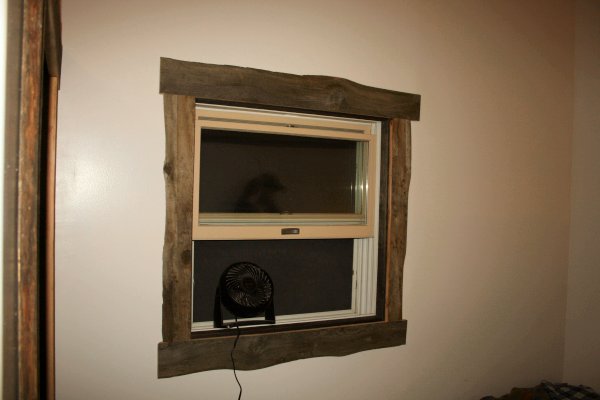
Continue to page 3 of this project If you do not see a menu on the left click here to go to our home page. |