
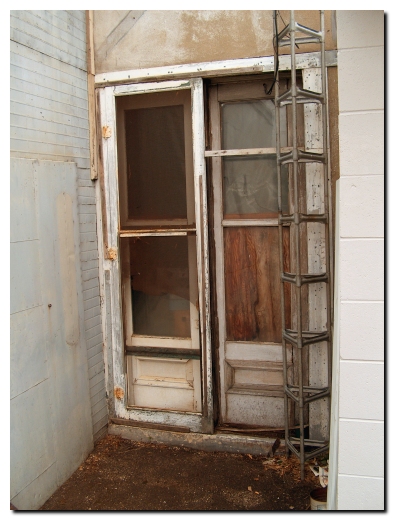
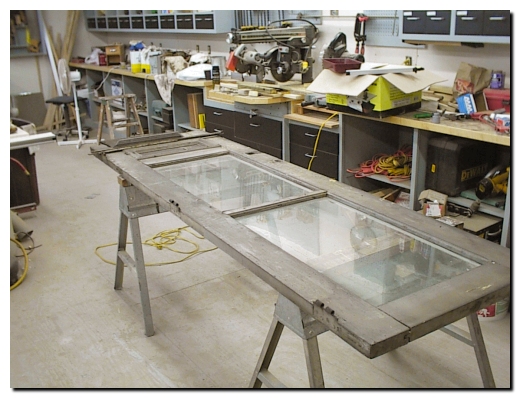
Our first project is to upgrade the electrical service, drain and disable the hot water heat boiler, remove all water lines to the second floor, and then install a new main floor bathroom. As part of this new work I need to restore an old door that provides an entry to the backside of the building, which you can see in the picture above. This door is very unique in that it is 8 foot high, about a foot taller than the standard doors seen today. It was also a double door, allowing a full 5-foot wide opening to what was originally a plumbing shop. My father sealed this door over 30 years ago as his access to the building is through the garage on the east side.
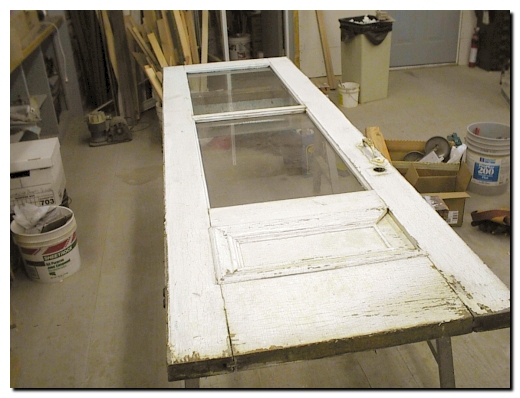
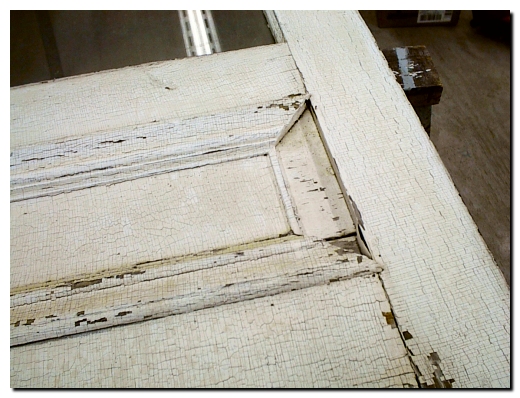
I removed the north door (right side as you face the outside) completely and closed in that half of the opening so that I could mount the electrical service where the door was located. After making sure the south door fit the new opening I removed it and brought it to my shop for the work. The picture above is the outside of the door before I started any work. The picture below is a close-up of the recessed panel and the missing trim piece. I salvaged spare trim pieces from the north door to replace this missing piece and will strip the many coats of paint on this door. This door has an eastern exposure so the sun has not had too much effect on the paint, but the weather and age of the paint has resulted in a terribly cracked surface.
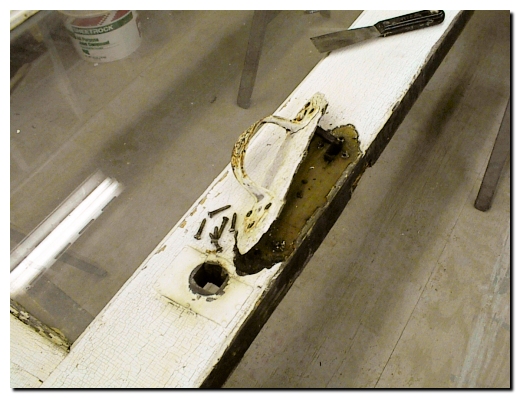
The picture below shows the hardware detail. This wonderful old door pull is still intact on the outside with the exception of the thumb latch that is broken off. The inside hardware is missing completely. It is interesting to note that the hardware was installed prior to painting the door when it was new. The deadbolt latch below the handle was missing as well. This deadbolt was a surface mounted unit on the backside of the door and the tin patch around the hole indicates that there have been at least two deadbolts over time. My first thought was that the patch was to repair rotted wood, but after removing the patch I found solid wood with no hint of a rot problem.
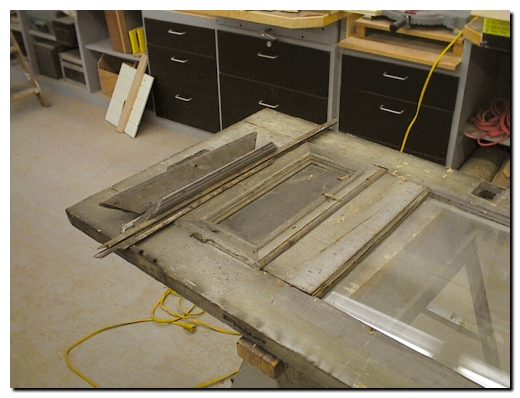
The paint on the inside of the door is in much better shape than the outside. It appears to be the original paint and relatively free of cracks and crazing. There are nail and staple holes as well as other wear blemishes from the years of use. The inside was covered with glass storm windows nailed to the door and then covered with plastic to seal up the opening. These coverings are more than likely helped preserve the finish. The window trim pieces were rotted from water seeping around the dried putty that the glass was set in, but the door itself is as sound as the day it was originally hung. The picture below shows the lower panel detail on the inside and the salvage trim pieces from the north door.
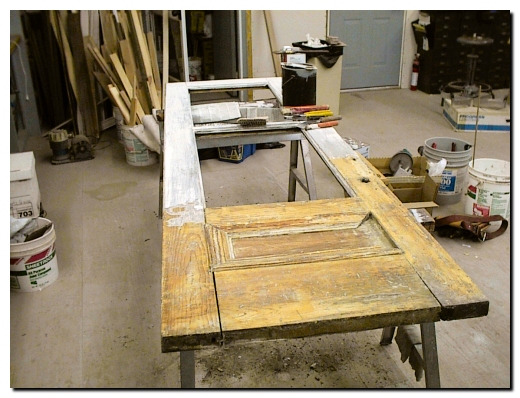
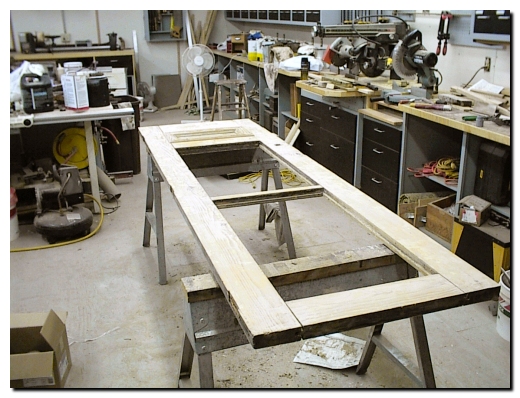
When I say that the door is as sound as when it was hung I mean the wood itself is sound and does not indicate rot or cracked or split pieces. Several of the joints, on the other hand, have separated a little and once the paint is removed I will need to try to repair these areas. I tested the door while it was hanging and could not rack the door so it is still solid; hopefully this strength is not in the paint only! I began this project by removing all the hardware and the windows. The glass appears to be original and will be installed when the door is repaired and primed. The picture below shows the initial work to remove the paint. I am using a liquid stripper and a variety of scrapers to remove the softened paint. The paint is unsightly, but remains adhered to the surface, perhaps because it is surely lead based paint. I have found white, dark gray, and the original color appears to have been a pale butter yellow color.

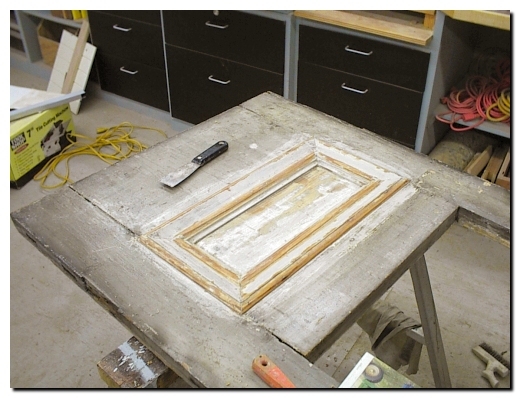
The outside of the door was difficult to strip with the many coats. But at the picture above shows it cleaned up nicely. When I first looked at this door I felt that the inside would not need to be stripped but upon closer investigation I realized the old paint had to go. The finish looks to be a primer and one or two finish coats. This made it easier to strip than the outside that had many more coats of paint. This picture shows the start of the stripping process as I went to work on the lower recessed panel.
I started stripping the inside of the door using the liquid stripper, but quickly found that the paint was so dry and brittle that it was faster to remove it with a paint scraper only. The picture below shows the door completely stripped and ready for restoration.
Return to Dan's Shop Page. . . . Next Page
If you have any questions or comments please feel free to send e-mail.
This web site, like the rest of www.breyfogle.com, is self-supported, but occasionally we find a commercial site that we really enjoy working with and will direct you there for further information. We have found Hartville Tools to be a great source of tools at a reasonable price and their website is very easy to navigate. Give them a try.
If you do not see a menu bar on the left you are missing a lot more information like this on www.breyfogle.com